


How to set up Auto ads and implements codes for your AMP websites
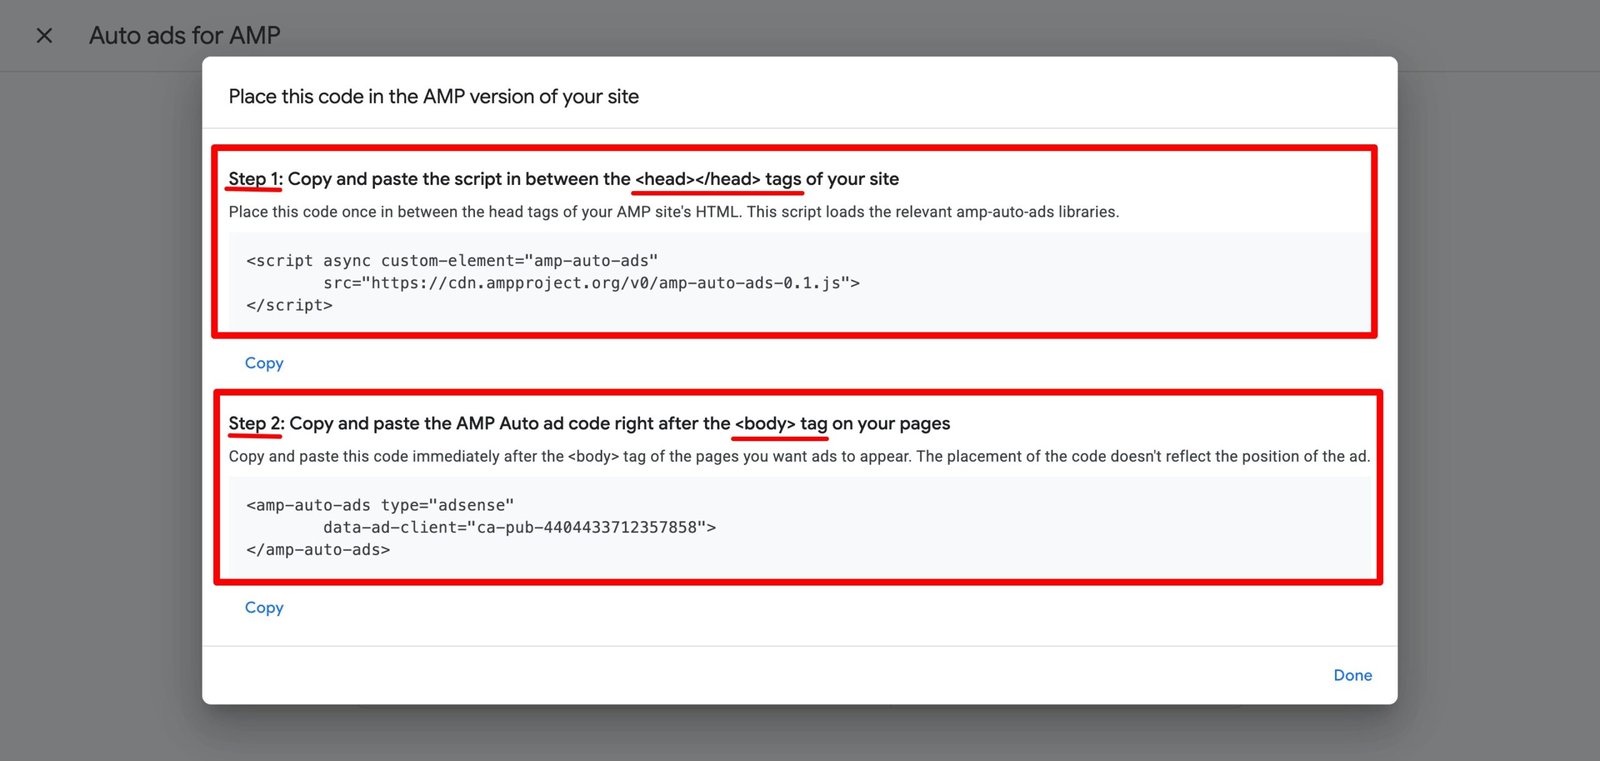
Place this code in the AMP version of your site
Step 1: Copy and paste the script in between the <head></head> tags of your site
Place this code once in between the head tags of your AMP site’s HTML. This script loads the relevant amp-auto-ads libraries.
<script async custom-element="amp-auto-ads"
        src="https://cdn.ampproject.org/v0/amp-auto-ads-0.1.js">
</script>
Step 2: Copy and paste the AMP Auto ad code right after the <body> tag on your pages
Copy and paste this code immediately after the <body> tag of the pages you want ads to appear. The placement of the code doesn’t reflect the position of the ad.
<amp-auto-ads type="adsense"
        data-ad-client="ca-pub-XXXXXXXXXXXXXXXX">
</amp-auto-ads>
It can take up to an hour for ads to appear on the page. See How to set up Auto ads for AMP.
Auto ads: Set up Auto ads on your AMP site
Auto ads for AMP automatically place AdSense Auto ads on your AMP pages. After you’ve added the AMP auto script and ad code, Google will automatically show ads on your AMP pages at optimal times when they’re likely to perform well and provide a good experience.
Before you get started
- Make your pages discoverable with
<link>tags to pair non-AMP and AMP content.
ExampleLet’s say you have a site example.com and you host the AMP versions of each page under example.com/amp/. You’d add <link> tags in the <head> of each AMP and non-AMP page to indicate which content belongs together.
In the non-AMP example.com/news page:
<link rel="amphtml" href="http://example.com/amp/news">
In the AMP example.com/amp/news page:
<link rel="canonical" href="http://example.com/news">
For subtitles in your language, turn on YouTube captions. Select the settings icon ![]() at the bottom of the video player, then select “Subtitles/CC” and choose your language.
at the bottom of the video player, then select “Subtitles/CC” and choose your language.

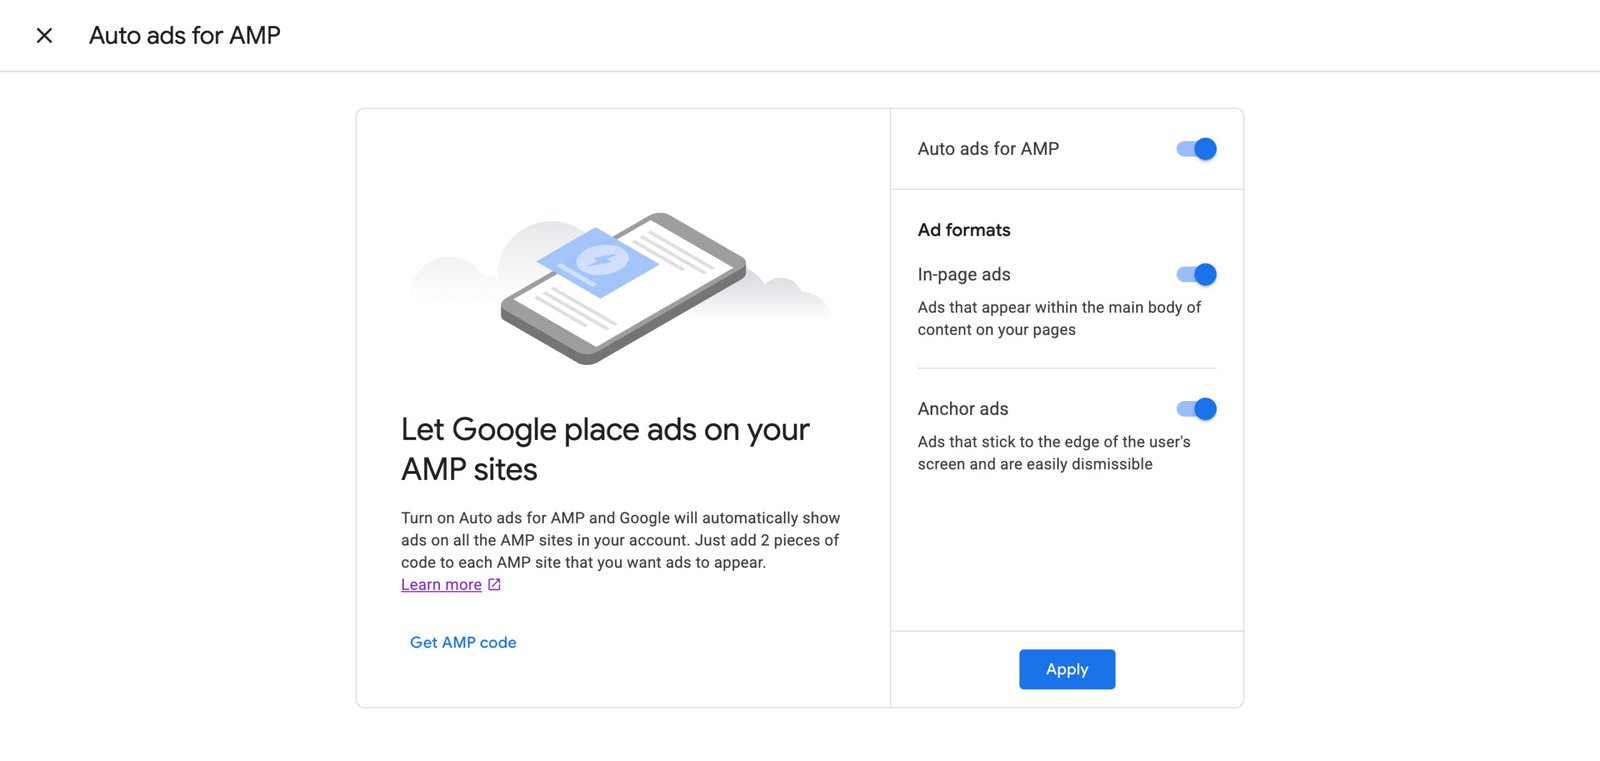
Set up Auto ads for AMP
- Sign in to your AdSense account.
- Click Ads.
- Click Got an AMP site?
- On the “Auto ads for AMP” page, turn on Auto ads for AMP.
- (Optional) In the “Ad formats” section, turn off any ad formats that you’d prefer not to show on your AMP site. Learn more about ad format settings.
- Click Get AMP code.
- Copy and paste the script between the
<head></head>tags of your page.This script loads the requiredamp-auto-adslibraries. Learn more about theamp-auto-adscomponent. - Copy and paste the AMP Auto ad code immediately after the opening
<body>tag of the pages you want ads to appear. - Click Done.
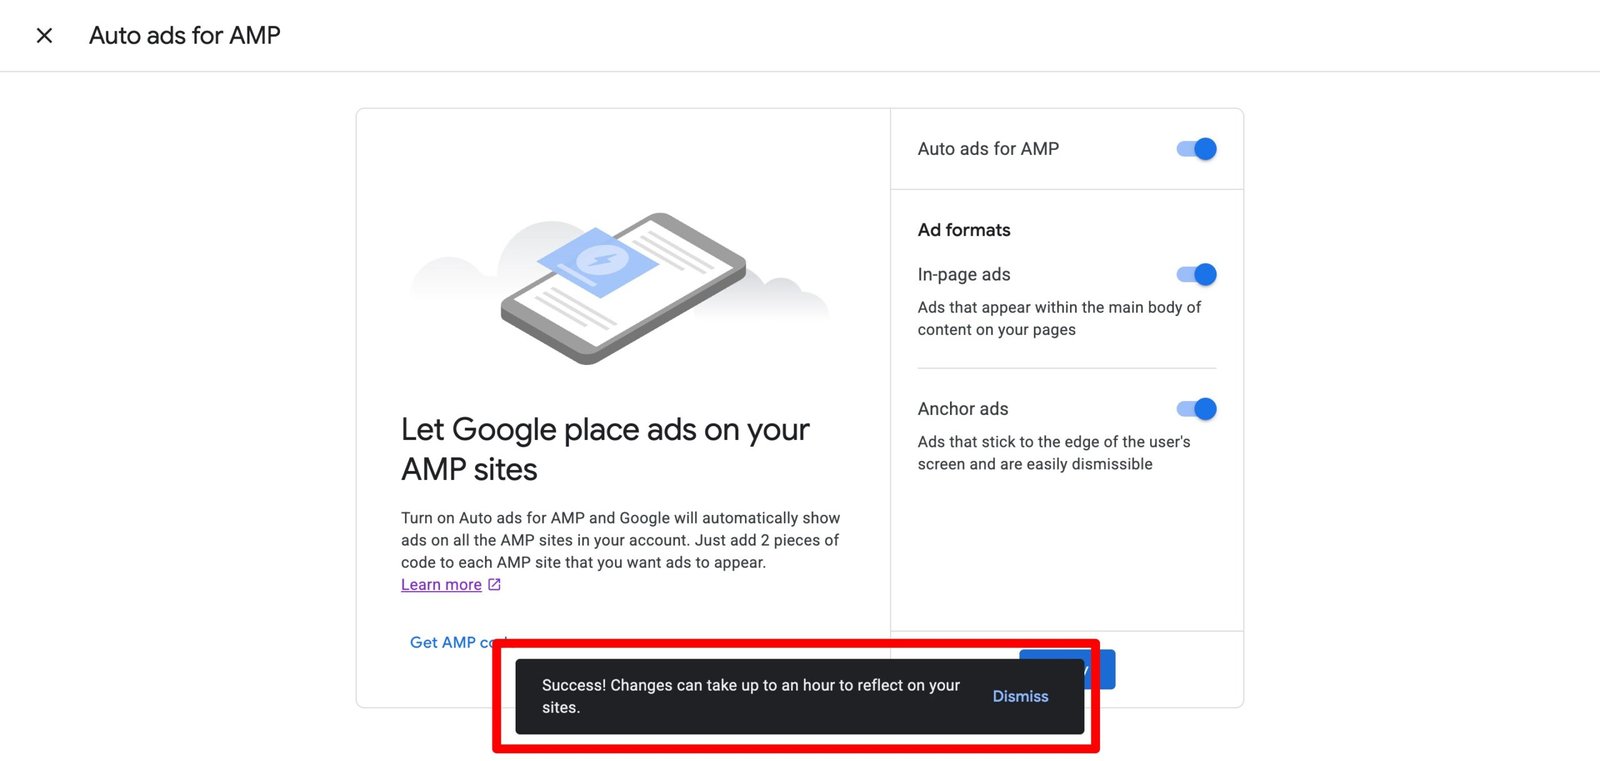
- Click Apply. It can take up to an hour for ads to appear on the page.On your Ads page, it now says “AMP is on”.
How to Set up Auto ads and implements codes for AMP on your WordPress Website?
STEP 0: Important AMP sanity check (don’t skip this)
Your site must already have AMP enabled, usually via:
- Official AMP by Google plugin, or
- Rank Math AMP, or
- Any AMP-compatible plugin
WPCode does not create AMP—it only injects code into AMP pages if AMP exists.
STEP 1: Go to WPCode → Add Snippet
- Open WordPress Admin Dashboard
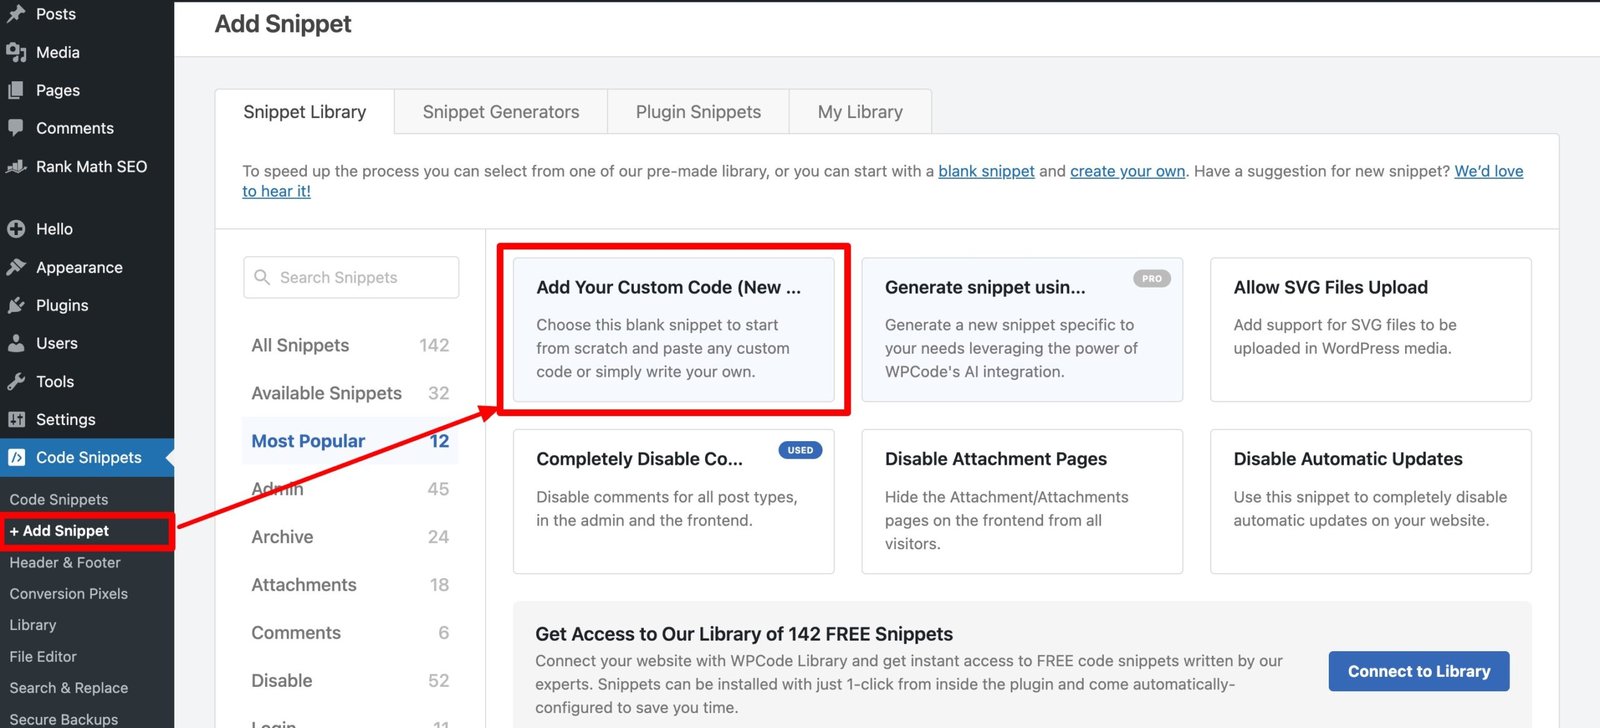
- Click Code Snippets → + Add Snippet
- Choose Add Your Custom Code (New Snippet)
STEP 2: Create Snippet for AMP <head> Script
This is Google’s Step 1 (AMP library loader).
2.1 Snippet Details
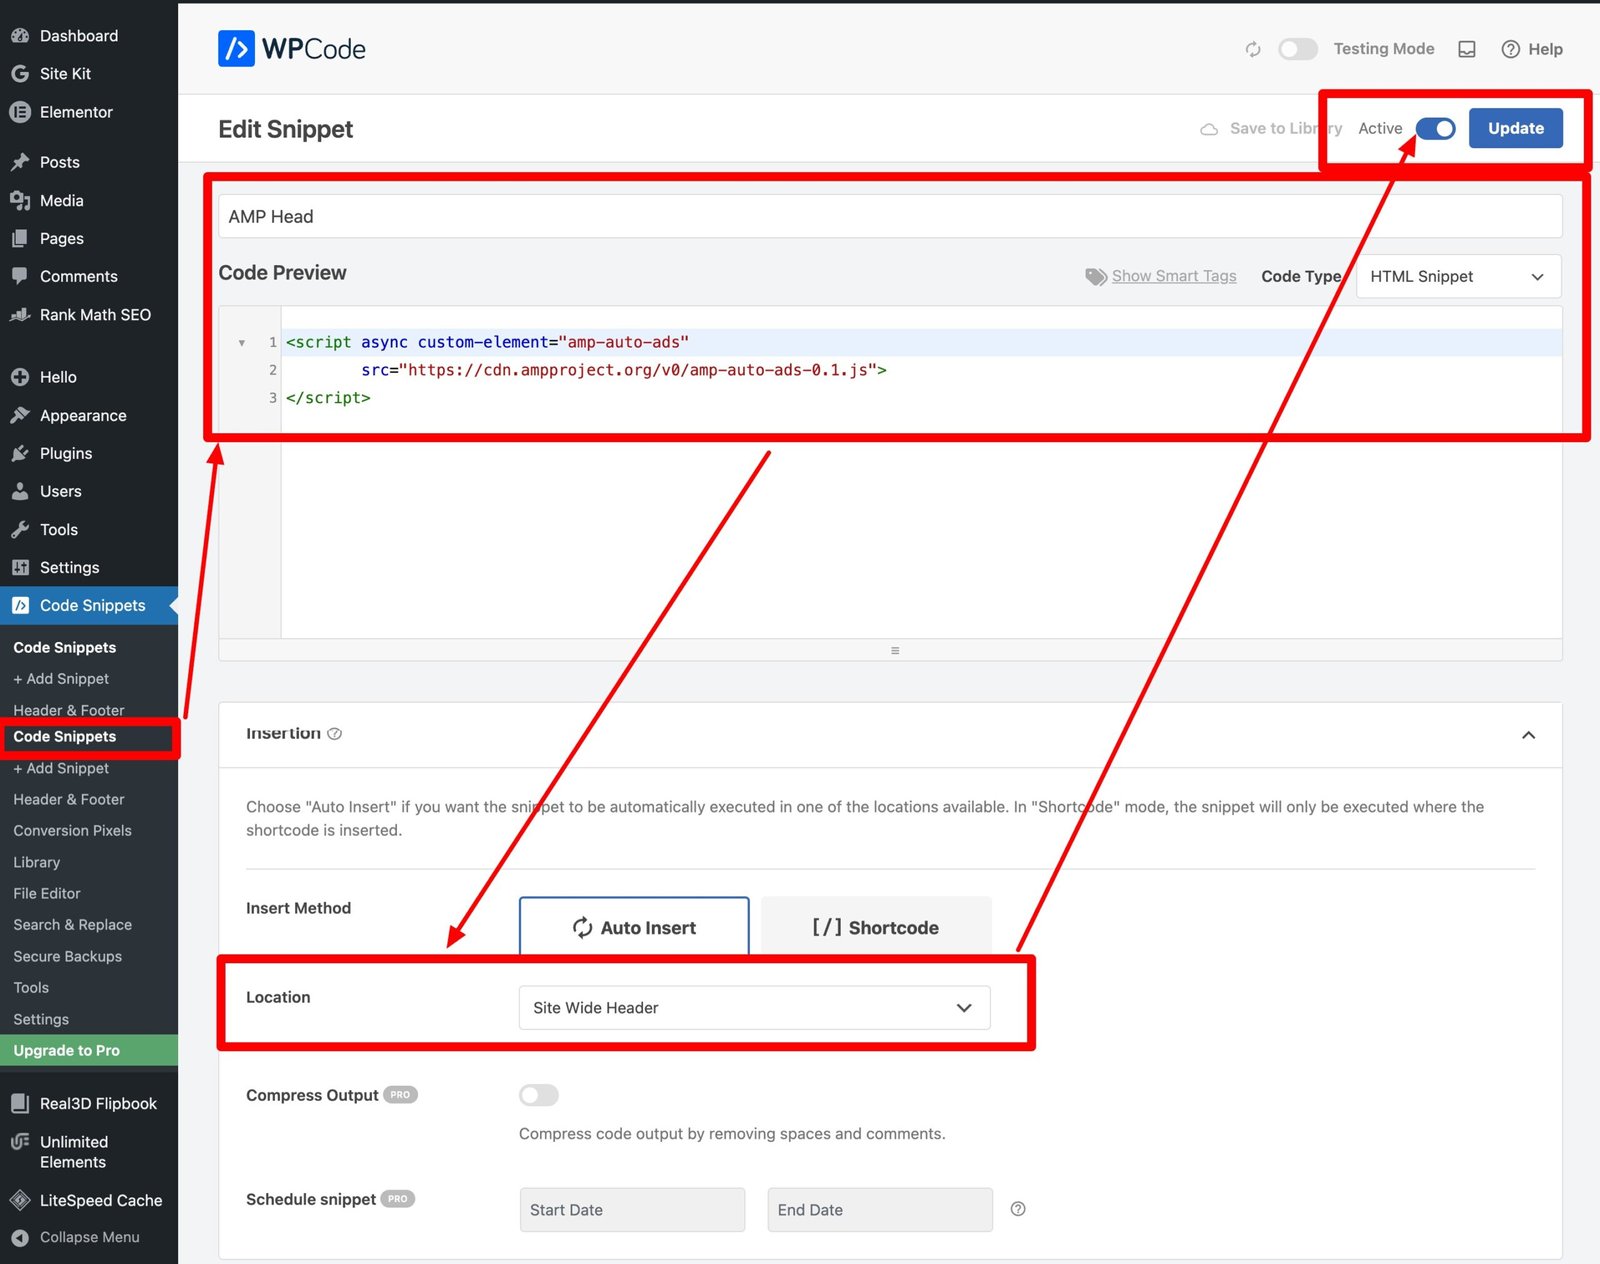
- Snippet Name:
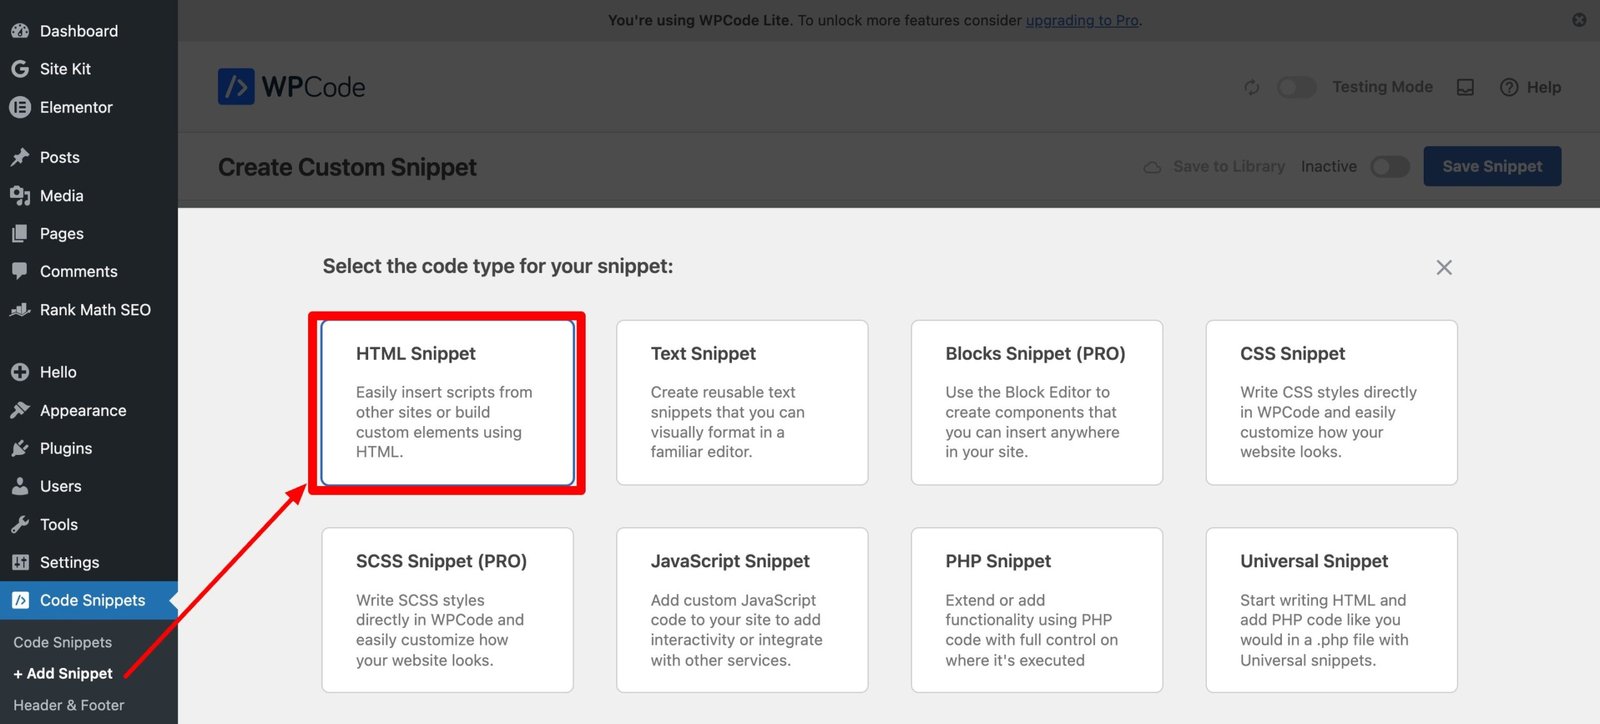
AMP Auto Ads – Head - Code Type:
HTML Snippet
2.2 Paste This Code
Paste only this in the code editor:
<script async custom-element="amp-auto-ads"
        src="https://cdn.ampproject.org/v0/amp-auto-ads-0.1.js">
</script>
2.3 Set Insertion Rules
Scroll to Insertion:
- Insert Method: Auto Insert
- Location: Site Wide Header
Now click Smart Conditional Logic (very important):
- Enable Conditional Logic
- Condition:
- Show snippet if → Page Type → is AMP Page
This ensures the script loads only on AMP pages, not normal HTML pages.
2.4 Activate & Save
- Toggle Active
- Click Update
AMP <head> script is now correctly placed.
STEP 3: Create Snippet for AMP <body> Auto Ads
This is Google’s Step 2 (actual ad placement).
3.1 Add New Snippet Again
- Go to Code Snippets → + Add Snippet
3.2 Snippet Details
- Snippet Name:
AMP Auto Ads – Body - Code Type:
HTML Snippet

3.3 Paste This Code
<amp-auto-ads type="adsense"
        data-ad-client="ca-pub-4404433712357858">
</amp-auto-ads>
3.4 Set Insertion Rules
Scroll to Insertion:
- Insert Method: Auto Insert
- Location: After
<body>tag
Then apply Smart Conditional Logic:
- Enable Conditional Logic
- Show snippet if → Page Type → is AMP Page
This places the ad code immediately after <body>, exactly as Google requires.
3.5 Activate & Save
- Toggle Active
- Click Update
STEP 4: Verify AMP Ads
Check your AMP page:
https://yourdomain.com/post-url/amp/
Then test with:
- AMP Validator
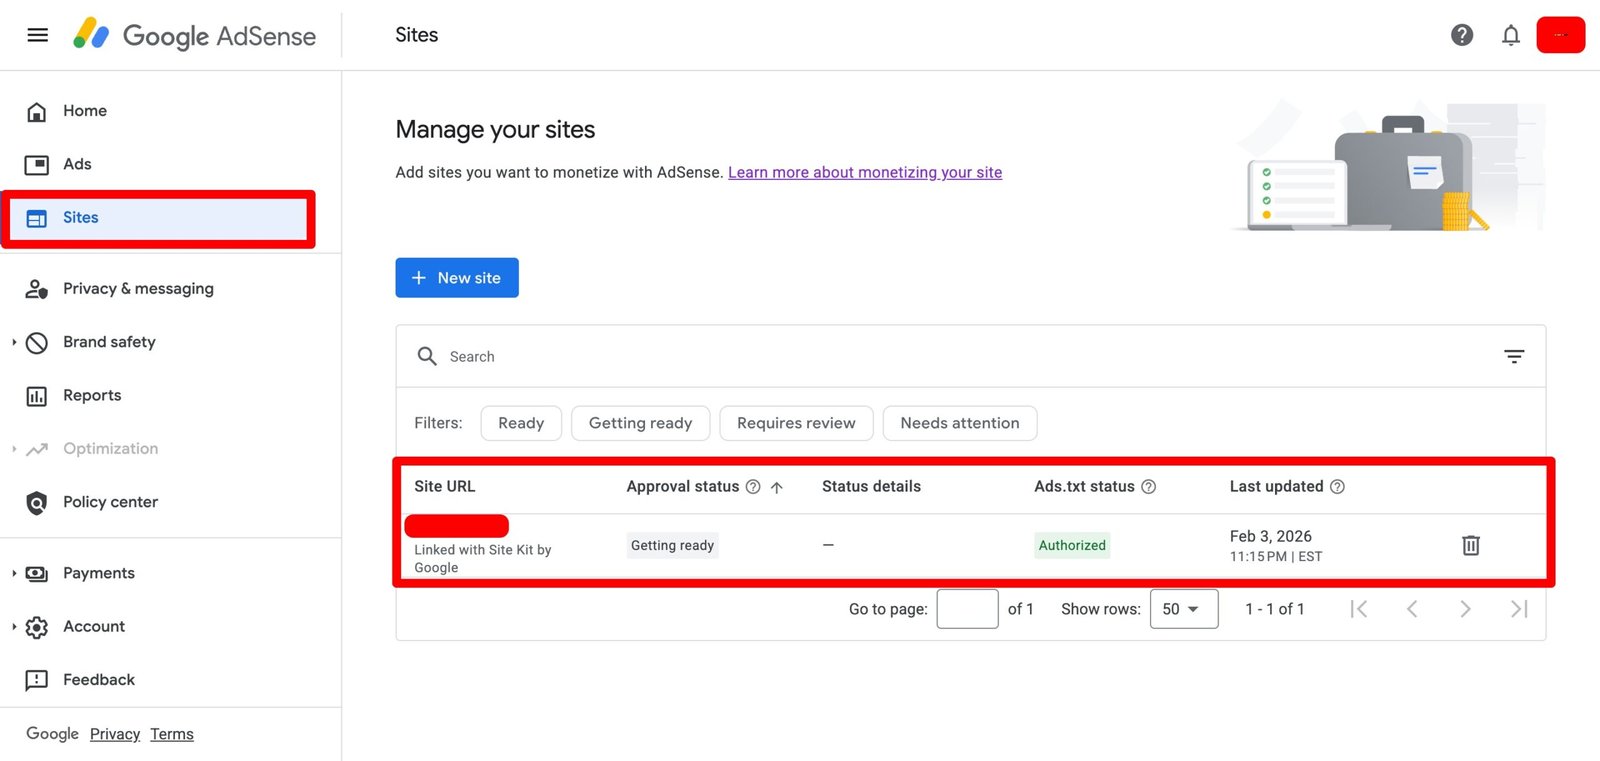
- Google AdSense → Sites → AMP
Ads may take 24–48 hours to start appearing.